October 23, 2018 Machine Learning Classification RNN Keras NLP
Introduction
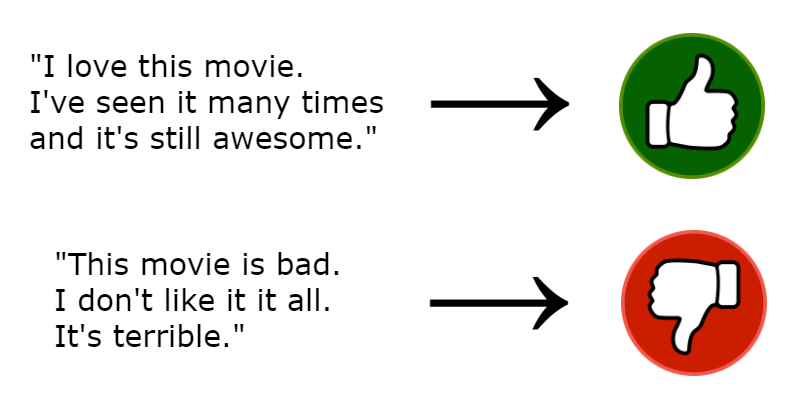
Sentiment classification is a Natural Language Processing (NLP) task where the objective is to predict the sentiment of some text input. For example, predicting a one to five star rating given a product review, or predicting the emotion of a text message. In this post I’m going to show you how I implemented sentiment classification for predicting whether a movie review is positive or negative.
The dataset I used is the “Large Movie Review Dataset” which can be found at http://ai.stanford.edu/~amaas/data/sentiment/. It was introduced in the paper Learning Word Vectors for Sentiment Analysis by Andrew L. Maas, Raymond E. Daly, Peter T. Pham, Dan Huang, Andrew Y. Ng, and Christopher Potts. (ACL 2011). The dataset contains 25000 highly polar (distinctly positive or negative) movie reviews for training and 25000 for testing. I kept the training data as my training set, but split the test data into a validation set used to evaluate different models, and a test set used to evaluate if the final model generalizes well.
The project was implemented in Keras, and the source code can be found at https://github.com/CarlFredriksson/sentiment_classification.
Implementation
Load Data
After downloading the dataset, you will see that both the training and test data is divided into directories of negative and positive examples. Each example has its own file, which means that we need to open every file, read it, and append the text to the correct input set (X_train or X_test). We also need to append a label of 0 or 1 to the corresponding output sets Y_train or Y_test for each text example. I chose to use 0 for examples with negative sentiment, and 1 for examples with positive sentiment.
import os
X_train, Y_train, X_test, Y_test = sc_utils.load_data()
def load_data():
    # neg = 0, pos = 1
    X_train, Y_train, X_test, Y_test = [], [], [], []

    # Prepare paths
    data_path = os.path.join(os.getcwd(), "data")
    train_neg_path = os.path.join(data_path, "train", "neg")
    train_pos_path = os.path.join(data_path, "train", "pos")
    test_neg_path = os.path.join(data_path, "test", "neg")
    test_pos_path = os.path.join(data_path, "test", "pos")

    # Load training data
    for filename in os.listdir(train_neg_path):
        with open(os.path.join(train_neg_path, filename), encoding="utf8") as f:
            review = f.readline()
            X_train.append(review)
            Y_train.append(0)
    for filename in os.listdir(train_pos_path):
        with open(os.path.join(train_pos_path, filename), encoding="utf8") as f:
            review = f.readline()
            X_train.append(review)
            Y_train.append(1)
    print("Training data loaded")

    # Load test data
    for filename in os.listdir(test_neg_path):
        with open(os.path.join(test_neg_path, filename), encoding="utf8") as f:
            review = f.readline()
            X_test.append(review)
            Y_test.append(0)
    for filename in os.listdir(test_pos_path):
        with open(os.path.join(test_pos_path, filename), encoding="utf8") as f:
            review = f.readline()
            X_test.append(review)
            Y_test.append(1)
    print("Test data loaded")

    return X_train, Y_train, X_test, Y_test
Preprocess Data
The first thing we want to do is to encode texts as sequences of numbers, where each number corresponds to a word index. To create such word indices we need to know what words are used in the dataset. Fortunately, there is a vocabulary file provided with the dataset which contains all used words.
To help with the task of encoding text as sequences of word indices we can use the Keras class Tokenizer. The Tokenizer assigns an index for each word it considers distinct in the vocabulary. There is a default filter that disregards the symbols !"#$%&()*+,-./:;<=>?@[\]^_`{|}~, which makes the Tokenizer not consider some lines in the vocabulary as words. For example, the vocabulary contains many emojis (such as :) and :-p) which are disregarded because of this filter. Changing the default filter might be a worthwhile experiment, but I did not bother for this project.
After initializing the tokenizer on our vocabulary using tokenizer.fit_on_texts(vocab), we can convert our texts to sequences of word indices. The sequences are then padded to make them equal length, which is important for training in batches. Sequences that are too short get zeroes added at the end, and sequences that are too long gets clipped.
After converting the processed training and test data to numpy arrays, the data is shuffled and the test data is divided into equally sized validation and test sets.
import numpy as np
from keras.preprocessing.text import Tokenizer
from keras.preprocessing.sequence import pad_sequences
from sklearn.utils import shuffle
INPUT_LENGTH = 100
X_train, Y_train, X_val, Y_val, X_test, Y_test, tokenizer = sc_utils.preprocess_data(X_train, Y_train, X_test, Y_test, INPUT_LENGTH)
def preprocess_data(X_train, Y_train, X_test, Y_test, input_len):
    # Load vocabulary
    vocab_path = os.path.join(os.getcwd(), "data", "imdb.vocab")
    with open(vocab_path, encoding="utf8") as f:
        vocab = f.read().splitlines()
    print("Vocabulary length before tokenizing: " + str(len(vocab)))

    # Prepare tokenizer, the out of vocabulary token for GloVe is "unk"
    tokenizer = Tokenizer(oov_token="unk")
    tokenizer.fit_on_texts(vocab)
    vocab_len = len(tokenizer.word_index) + 1
    print("Vocabulary length after tokenizing: " + str(vocab_len))

    # Convert text to sequences of indices
    X_train = tokenizer.texts_to_sequences(X_train)
    X_test = tokenizer.texts_to_sequences(X_test)

    # Pad sequences with zeros so they all have the same length
    X_train = pad_sequences(X_train, maxlen=input_len, padding="post")
    X_test = pad_sequences(X_test, maxlen=input_len, padding="post")

    # Convert training and test data to numpy arrays
    X_train = np.array(X_train, dtype="float32")
    Y_train = np.array(Y_train, dtype="float32")
    X_test = np.array(X_test, dtype="float32")
    Y_test = np.array(Y_test, dtype="float32")

    # Shuffle training and test data
    X_train, Y_train = shuffle(X_train, Y_train)
    X_test, Y_test = shuffle(X_test, Y_test)

    # Split test data into validation and test sets
    split_index = int(0.5 * X_test.shape[0])
    X_val = X_test[split_index:]
    Y_val = Y_test[split_index:]
    X_test = X_test[:split_index]
    Y_test = Y_test[:split_index]

    return X_train, Y_train, X_val, Y_val, X_test, Y_test, tokenizer
Create Embedding Matrix
A common tool in NLP is to use word embeddings, which are vectors that characterizes words. Each word has a corresponding vector, and words with similar meaning are expected to have embedding vectors that are close to each other in the vector space. Using word embeddings has many advantages, one of which is making models more robust to rarely seen words. Word embeddings can be learned as part of the model, or you can use pretrained embeddings. I tried both approaches and found that using pretrained embeddings was a better choice for this project since it made the model overfit less. There are many types of word embeddings. I decided to use pretrained GloVe embeddings which can be downloaded from https://nlp.stanford.edu/projects/glove/.
In order to use the embeddings in our models, we need to create a matrix where each row contains an embedding vector for the word that has a word index equal to the index of that row.
embedding_matrix = sc_utils.create_embedding_matrix(tokenizer)
def create_embedding_matrix(tokenizer):
    # Load GloVe embedding vectors
    embedding_path = os.path.join(os.getcwd(), "data", "glove.6B", "glove.6B.100d.txt")
    word_to_embedding = {}
    with open(embedding_path, encoding="utf8") as f:
        for line in f.readlines():
            values = line.split()
            word = values[0]
            embedding_vec = np.asarray(values[1:], dtype="float32")
            word_to_embedding[word] = embedding_vec
    print("Embedding vectors loaded")

    # Create embedding matrix
    embedding_vec_dim = 100
    vocab_len = len(tokenizer.word_index) + 1
    embedding_matrix = np.zeros((vocab_len, embedding_vec_dim))
    for word, i in tokenizer.word_index.items():
        embedding_vec = word_to_embedding.get(word)
        if embedding_vec is not None:
            embedding_matrix[i] = embedding_vec
    print("Embedding matrix created")

    return embedding_matrix
Create Models
Now it is time to create some models. First let’s create a very simple model to get a baseline performance. The baseline model simply averages the word embeddings of an input. The Embedding layer is used to convert sequences of word indices to sequences of embedding vectors. Not that since we are using pretrained embeddings that we don’t want to train further, the weights are initialized to our embedding matrix and the trainable flag is set to false. Also note that the parameter mask_zero is set to true. This masks the padded zeros in the input sequences, which is good since we only need them to make sure that the input lengths are equal. The output is a dense layer with a single output and sigmoid activation since we are doing binary classification.
from keras.models import Sequential, Input, Model
from keras.layers import Dense, Flatten, Embedding, Average, Activation, Lambda, Dropout, LSTM, Bidirectional
from keras.initializers import Constant
import keras.backend as K
from keras import regularizers
def create_baseline_model(embedding_matrix, input_len):
    model = Sequential()
    model.add(Embedding(embedding_matrix.shape[0], embedding_matrix.shape[1],
        embeddings_initializer=Constant(embedding_matrix), input_length=input_len,
        trainable=False, mask_zero=True))
    model.add(Lambda(lambda x: K.mean(x, axis=1)))
    model.add(Dense(1, activation="sigmoid"))
    model.compile(optimizer="adam", loss="binary_crossentropy", metrics=["accuracy"])
    return model
Let’s now create a more complex model. This model uses a recurrent neural network (RNN) with LSTM layers, which is very common for many types of sequential data. I tried several hyperparameter settings such as varying the number of LSTM, Dropout, and Dense layers. I also varied the output sizes of the LSTM and Dense layers, and the rate of the Droput layers. The model I ended up with, by chosing the one with the highest accuracy on the validation set, has two layers of LSTM units and one extra Dense layer. Note that the parameter return_sequences is set to true for the first LSTM layer. This makes the layer return all outputs, instead of returning the last one only, which is required when connecting two recurrent layers.
def create_rnn_model(embedding_matrix, input_len):
    model = Sequential()
    model.add(Embedding(embedding_matrix.shape[0], embedding_matrix.shape[1],
        embeddings_initializer=Constant(embedding_matrix), input_length=input_len,
        trainable=False, mask_zero=True))
    model.add(LSTM(64, return_sequences=True, recurrent_dropout=0.5))
    model.add(Dropout(0.5))
    model.add(LSTM(64))
    model.add(Dense(64, activation="relu"))
    model.add(Dense(1, activation="sigmoid"))
    model.compile(optimizer="adam", loss="binary_crossentropy", metrics=["accuracy"])
    return model
I also tried some versions of a bidirectional RNN and som versions of a RNN where the embeddings were learned instead of pretrained. None of them performed better on the validation set. Implementations of two of these models are available with the source code but omitted here.
Train and Evaluate Models
I used a batch size of 200 for all training runs. I trained the baseline model for 500 epochs since it took alot of epochs before the training loss converged and each epoch ran very quickly. The baseline model scored 77.16% accuracy on the validation set.
model = model_factory.create_baseline_model(embedding_matrix, INPUT_LENGTH)
model.fit(X_train, Y_train, batch_size=200, epochs=500)
val_loss, val_accuracy = model.evaluate(X_val, Y_val, verbose=0)
I only trained the RNN model for 30 epochs since the training loss converged much quicker. The RNN model scored 85.45% accuracy on the validation set. Since this is the final model I also evaluated it on the test set. The accuracy on the test set was 85.43%, which suggests that the model generalizes well (at least on highly polar movie reviews).
model = model_factory.create_rnn_model(embedding_matrix, INPUT_LENGTH)
model.fit(X_train, Y_train, batch_size=200, epochs=30)
val_loss, val_accuracy = model.evaluate(X_val, Y_val, verbose=0)
test_loss, test_accuracy = model.evaluate(X_test, Y_test, verbose=0)
Conclusion
Sentiment classification can be used for many applications, for example when analyzing customer reviews or survey responses. In marketing and business developement one might be interested in extracting customer information from textual data, such as the percentage of people that are happy with your product. It can be used to assess the emotion of a user that inputs text or speech into an application, which could be of interest in all kinds of applications ranging from chat bots to medical self-help systems.
In order to further improve the performance of the model there are more things to try that I didn’t bother with. One of which is the input length of sequences. I set it to 100, which means that only the first 100 words of each review is considered. Many reviews in the dataset are much longer, and using more words might improve the classification accuracy. However, this would make the training times slower. Another thing to try is to change the dimensionality of the word embeddings. The pretrained GloVe embeddings comes with vectors of dimensions 50, 100, 200, and 300, but I only tried the 100 dimensional ones.
I hope this post helped you out, and feel free to send me any questions.